

ATAS Options X-Ray Key Levels: Walls, Slippery Zone, Flip and Pin
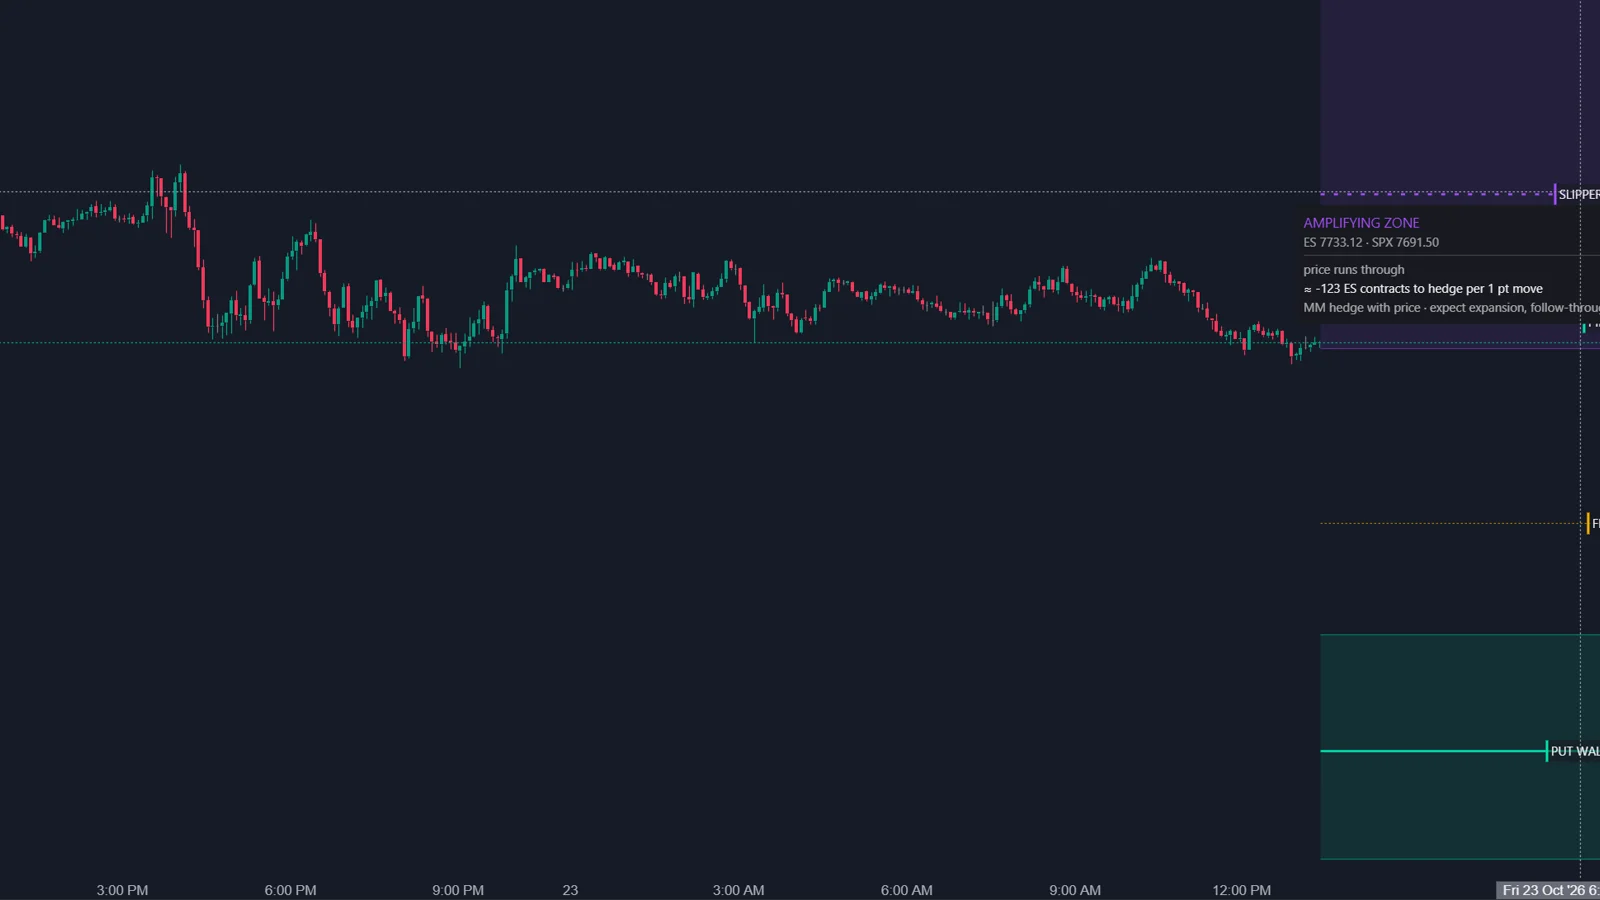
Options X-Ray: Key Levels draws the call wall, the put wall, a slippery zone, the regime flip and an optional 0DTE pin as labeled lines on ES, MES, SPY and US 500 charts. Unlike Options Chain: Key Levels, it does not use daily open interest: it uses SPX market maker positioning from OptionsDepth, recalculated every minute, and shows each wall's strength in ES contracts.
What do the levels mean?
| Level | Meaning in ATAS | What to expect |
|---|---|---|
| CALL WALL | Strongest zone above price where market maker hedging works against the move | Price tends to slow down, stall or pull back |
| PUT WALL | Same type of zone below price | Price tends to slow down and find support |
| SLIPPERY | Nearby zone where hedging works with the move | Price can pass through faster than usual |
| FLIP | Regime boundary: above it hedging tends to damp movement, below it to amplify | The character of the day can change when price crosses it |
| PIN (0DTE) | Strongest strike near price where options expiring today hold price in place | On expiration days, price may be pulled toward it; off by default |
Definitions from the ATAS help article. Expectations are tendencies, not outcomes.
Walls are drawn as zones with a line at the strongest point. ATAS stresses that the zone is not decoration: its width shows how wide the slowdown area really is, and a wall is not a single price where the market must turn. Up to three walls per side can be shown; the additional ones are thinner and numbered, so you can see where the next slowdown zone is if the main wall breaks.
What does the strength number mean?
How many ES contracts market makers may need to buy or sell for each point of price movement at that level.
The ATAS example card reads: a damping wall where market makers may need to trade about 298 ES contracts per point of movement. The card also shows the level on your chart next to the matching SPX level, a short verdict such as price brakes here, and an explanation such as market makers hedge against price, expect compression, fades and range. The number is a hedge estimate from the model, not a count of contracts that were traded.
Why is the slippery zone something open interest cannot show?
Because it depends on the sign of the market maker position. ATAS writes that to find such a zone you need to know whether market makers are long or short at a level, not just how many contracts exist. With open interest, that sign is an assumption. In X-Ray, the position side comes from OptionsDepth, which states that its market maker data is based on participant-tagged exchange data from Cboe.
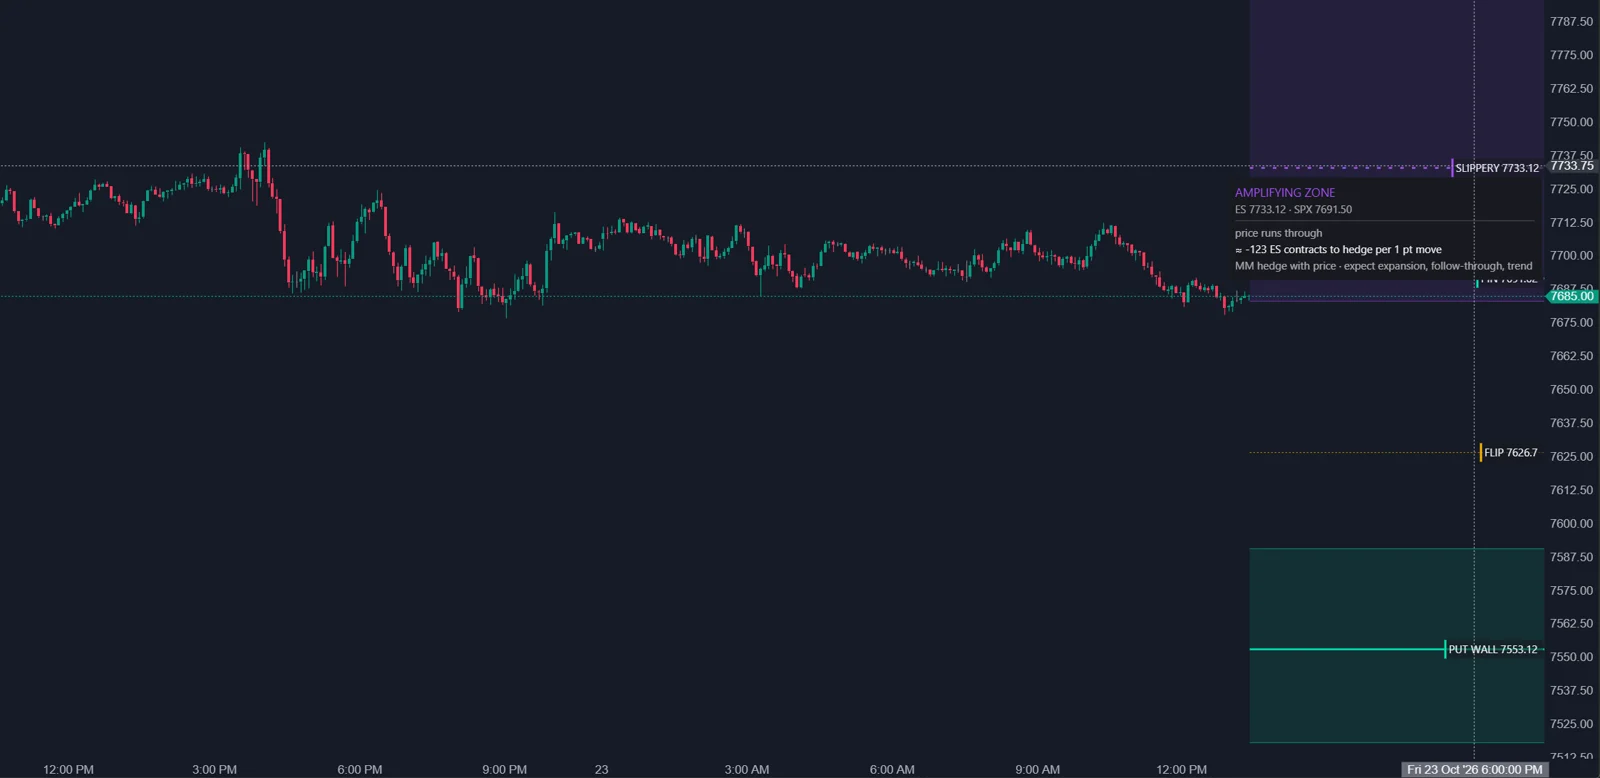
From practice: in the author's own setup in October 2026, the Options X-Ray indicators run in ATAS X. The ATAS help articles do not say which platform version they cover, so treat this as the author's experience.
How is Pin different from max pain?
Max pain counts contracts and finds the strike where option buyers would lose the most at expiration. ATAS argues that the count itself does not move price; hedging around a strong strike does, and Pin shows that strike. That is why Pin does not have to match max pain from public websites. Pin is off by default and is mainly useful on expiration afternoons.
Which settings does X-Ray Key Levels have?
| Setting | Default | What it does |
|---|---|---|
| Walls, Slippery, Flip, Pin | All on except Pin | Turns each level type on or off |
| Walls per side | 1 | From 1 to 3 walls above and below price |
| Max level distance, pts | 200 | Hides levels farther from price than this distance |
| Label position | Right | Right, left or center |
| Line extent | Not stated | From the last candle or across the full chart |
| Zone opacity | 26 | Zone fill; at 0 only the lines remain |
| Hover tooltip | On | Off, On or While Ctrl is held |
What happens outside trading hours?
The indicator shows a projection for the next session open based on the latest positions, and the label and card say outlook, so a projection is never presented as observed data. During the session, a wall that did not exist in the morning can become the main level by noon, and the indicator shows it the same minute.
How do I work with the levels?
- Find the nearest walls above and below price: they outline where movement is likely to slow down today.
- Check whether price is above or below FLIP: above, expect a calmer market and fades; below, faster moves and follow-through.
- If SLIPPERY is close to price, do not expect price to hold inside that zone.
- On expiration days, enable Pin and watch whether price stays near that strike in the afternoon.
- Confirm entries with tape, clusters and delta, as ATAS recommends for every X-Ray indicator.
For a footprint trader, the walls are where to expect absorption, and the slippery zone is where to expect thin resistance and initiative. When a wall breaks on strong delta, the numbered second wall gives the next reference without opening another indicator.
FAQ
Why do the levels move during the day?
Positions change and the levels are recalculated every minute. ATAS calls this expected.
Why do the levels differ from Options Chain: Key Levels?
Options Chain uses daily open interest; Options X-Ray uses minute-level market maker positioning in SPX options. Different inputs give different levels.
Why is a wall missing?
It may be farther than Max level distance from price. Increase the distance or the number of walls per side.
The levels look misplaced and the status mentions calibration. What now?
The chart lacks enough history to map index levels onto it. Load more days on the chart.
This article is educational content, not financial advice.